Sunday, April 26, 2020

Chapter 1To 5 HTML

Contents

 
About
 
................................................................................................................................................................................... 1
 
Chapter 1: Getting started with HTML
 
................................................................................................................ 2
 
Section 1.1: Hello World 2
 
Chapter 2: Doctypes
 
.................................................................................................................................................... 4
 
Section 2.1: Adding the Doctype 4
Section 2.2: HTML 5 Doctype 4
 
Chapter 3: Headings
 
.................................................................................................................................................... 5
 
Section 3.1: Using Headings 5
 
Chapter 4: Paragraphs
 
.............................................................................................................................................. 6
 
Section 4.1: HTML Paragraphs
Chapter 5: Text Formatting
 
.....................................................................................................................................  6
.....................................................................................................................................  7
 
Section 5.1: Highlighting 7
Section 5.2: Bold, Italic, and Underline 7
Section 5.3: Abbreviation 8
Section 5.4: Inserted, Deleted, or Stricken 8
Section 5.5: Superscript and Subscript 8
 
Chapter 1: Getting started with HTML

Version Specification Release Date
1.0 N/A 1994-01-01
2.0 RFC 1866
1995-11-24
3.2 W3C: HTML 3.2 Specification
1997-01-14
4.0 W3C: HTML 4.0 Specification
1998-04-24
4.01 W3C: HTML 4.01 Specification
1999-12-24
5 WHATWG: HTML Living Standard
2014-10-28
5.1 W3C: HTML 5.1 Specification
2016-11-01
Section 1.1: Hello World
Introduction

HTML (Hypertext Markup Language) uses a markup system composed of elements which represent specific content. Markup means that with HTML you declare what is presented to a viewer, not how it is presented. Visual representations are defined by Cascading Style Sheets (CSS) and realized by browsers. Still existing elements that allow for such, like e.g. font, "are entirely obsolete, and must not be used by authors"[1].
HTML is sometimes called a programming language but it has no logic, so is a markup language. HTML tags provide semantic meaning and machine-readability to the content in the page.
An element usually consists of an opening tag (<element_name>), a closing tag (</element_name>), which contain the element's name surrounded by angle brackets, and the content in between:
<element_name>...content...</element_name>

There are some HTML elements that don't have a closing tag or any contents. These are called void elements. Void elements include <img>, <meta>, <link> and <input>.
Element names can be thought of as descriptive keywords for the content they contain, such as video, audio, table, footer.
A HTML page may consist of potentially hundreds of elements which are then read by a web browser, interpreted and rendered into human readable or audible content on the screen.
For this document it is important to note the difference between elements and tags:

Elements: video, audio, table, footer

Tags: <video>, <audio>, <table>, <footer>, </html>, </body>


Element insight

Let's break down a tag...

The <p> tag represents a common paragraph.

Elements commonly have an opening tag and a closing tag. The opening tag contains the element's name in angle brackets (<p>). The closing tag is identical to the opening tag with the addition of a forward slash (/) between the opening bracket and the element's name (</p>).
Content can then go between these two tags: <p>This is a simple paragraph.</p>.
 
Creating a simple page

The following HTML example creates a simple "Hello World" web page.

HTML files can be created using any text editor. The files must be saved with a .html or .htm[2] extension in order to be recognized as HTML files.

Once created, this file can be opened in any web browser.


Simple page break down

These are the tags used in the example:

Tag Meaning
<!DOCTYPE> Defines the HTML version used in the document. In this case it is HTML5.
See the doctypes topic for more information.
Opens the page. No markup should come after the closing tag (</html>). The lang attribute declares
 
<html>


<head>


<meta>
 
the primary language of the page using the ISO language codes (en for English). See the Content Language topic for more information.
Opens the head section, which does not appear in the main browser window but mainly contains information about the HTML document, called metadata. It can also contain imports from external stylesheets and scripts. The closing tag is </head>.
Gives the browser some metadata about the document. The charset attribute declares the character encoding. Modern HTML documents should always use UTF-8, even though it is not a requirement. In HTML, the <meta> tag does not require a closing tag.
See the Meta topic for more information.
 
<title> The title of the page. Text written between this opening and the closing tag (</title>) will be displayed on the tab of the page or in the title bar of the browser.
<body> Opens the part of the document displayed to users, i.e. all the visible or audible content of a page. No content should be added after the closing tag </body>.
<h1> A level 1 heading for the page.
See headings for more information.
<p> Represents a common paragraph of text.

1. ↑ HTML5, 11.2 Non-conforming features
2. ↑ .htm is inherited from the legacy DOS three character file extension limit.
 
Chapter 2: Doctypes

Doctypes - short for 'document type' - help browsers to understand the version of HTML the document is written in for better interpretability. Doctype declarations are not HTML tags and belong at the very top of a document. This topic explains the structure and declaration of various doctypes in HTML.
Section 2.1: Adding the Doctype
The <!DOCTYPE> declaration should always be included at the top of the HTML document, before the <html> tag.

Version ≥ 5

See HTML 5 Doctype for details on the HTML 5 Doctype.


Section 2.2: HTML 5 Doctype
HTML5 is not based on SGML (Standard Generalized Markup Language), and therefore does not require a reference to a DTD (Document Type Definition).
HTML 5 Doctype declaration:

Case Insensitivity

Per the W3.org HTML 5 DOCTYPE Spec:

A DOCTYPE must consist of the following components, in this order:

1. A string that is an ASCII case-insensitive match for the string "<!DOCTYPE".

therefore the following DOCTYPEs are also valid:


This SO article discusses the topic extensively: Uppercase or lowercase doctype?
 
Chapter 3: Headings

HTML provides not only plain paragraph tags, but six separate header tags to indicate headings of various sizes and thicknesses. Enumerated as heading 1 through heading 6, heading 1 has the largest and thickest text while heading 6 is the smallest and thinnest, down to the paragraph level. This topic details proper usage of these tags.
Section 3.1: Using Headings
Headings can be used to describe the topic they precede and they are defined with the <h1> to <h6> tags. Headings support all the global attributes.

<h1> defines the most important heading.
<h6> defines the least important heading.

Defining a heading:

Correct structure matters

Search engines and other user agents usually index page content based on heading elements, for example to create a table of contents, so using the correct structure for headings is important.
In general, an article should have one h1 element for the main title followed by h2 subtitles – going down a layer if necessary. If there are h1 elements on a higher level they shoudn't be used to describe any lower level content.

Example document (extra intendation to illustrate hierarchy):

 
Chapter 4: Paragraphs

Column Column
<p> Defines a paragraph
<br> Inserts a single line break
<pre> Defines pre-formatted text

Paragraphs are the most basic HTML element. This topic explains and demonstrates the usage of the paragraph element in HTML.

Section 4.1: HTML Paragraphs

The HTML <p> element defines a paragraph:


Display-

You cannot be sure how HTML will be displayed.

Large or small screens, and resized windows will create different results.

With HTML, you cannot change the output by adding extra spaces or extra lines in your HTML code. The browser will remove any extra spaces and extra lines when the page is displayed:
 
Chapter 5: Text Formatting

While most HTML tags are used to create elements, HTML also provides in-text formatting tags to apply specific text-related styles to portions of text. This topic includes examples of HTML text formatting such as highlighting, bolding, underlining, subscript, and stricken text

Section 5.1: Highlighting

The <mark> element is new in HTML5 and is used to mark or highlight text in a document "due to its relevance in another context".1

The most common example would be in the results of a search were the user has entered a search query and results are shown highlighting the desired query.


Output:


A common standard formatting is black text on a yellow background, but this can be changed with CSS.

Section 5.2: Bold, Italic, and Underline
Bold Text

To bold text, use the <strong> or <b> tags:


or


What's the difference? Semantics. <strong> is used to indicate that the text is fundamentally or semantically important to the surrounding text, while <b> indicates no such importance and simply represents text that should be bolded.

If you were to use <b> a text-to-speech program would not say the word(s) any differently than any of the other words around it - you are simply drawing attention to them without adding any additional importance. By using
<strong>, though, the same program would want to speak those word(s) with a different tone of voice to convey that the text is important in some way.

Italic Text

To italicize text, use the <em> or <i> tags:

 
or


What's the difference? Semantics. <em> is used to indicate that the text should have extra emphasis that should be stressed, while <i> simply represents text which should be set off from the normal text around it.

For example, if you wanted to stress the action inside a sentence, one might do so by emphasizing it in italics via
<em>: "Would you just submit the edit already?"

But if you were identifying a book or newspaper that you would normally italicize stylistically, you would simply use
<i>: "I was forced to read Romeo and Juliet in high school.

Underlined Text

While the <u> element itself was deprecated in HTMl 4, it was reintroduced with alternate semantic meaning in HTML 5 - to represent an unarticulated, non-textual annotation. You might use such a rendering to indicate misspelled text on the page, or for a Chinese proper name mark.


Section 5.3: Abbreviation

To mark some expression as an abbreviation, use <abbr> tag:


If present, the title attribute is used to present the full description of such abbreviation.

Section 5.4: Inserted, Deleted, or Stricken

To mark text as inserted, use the <ins> tag:


To mark text as deleted, use the <del> tag:


To strike through text, use the <s> tag:


Section 5.5: Superscript and Subscript

To offset text either upward or downward you can use the tags <sup> and <sub>. To create superscript:
 

To create subscript:
 
@EVERYTHINGNT

More information


Defcon 2015 Coding Skillz 1 Writeup

Just connecting to the service, a 64bit cpu registers dump is received, and so does several binary code as you can see:


The registers represent an initial cpu state, and we have to reply with the registers result of the binary code execution. This must be automated becouse of the 10 seconds server socket timeout.

The exploit is quite simple, we have to set the cpu registers to this values, execute the code and get resulting registers.

In python we created two structures for the initial state and the ending state.

cpuRegs = {'rax':'','rbx':'','rcx':'','rdx':'','rsi':'','rdi':'','r8':'','r9':'','r10':'','r11':'','r12':'','r13':'','r14':'','r15':''}
finalRegs = {'rax':'','rbx':'','rcx':'','rdx':'','rsi':'','rdi':'','r8':'','r9':'','r10':'','r11':'','r12':'','r13':'','r14':'','r15':''}

We inject at the beginning several movs for setting the initial state:

for r in cpuRegs.keys():
    code.append('mov %s, %s' % (r, cpuRegs[r]))

The 64bit compilation of the movs and the binary code, but changing the last ret instruction by a sigtrap "int 3"
We compile with nasm in this way:

os.popen('nasm -f elf64 code.asm')
os.popen('ld -o code code.o ')

And use GDB to execute the code until the sigtrap, and then get the registers

fd = os.popen("gdb code -ex 'r' -ex 'i r' -ex 'quit'",'r')
for l in fd.readlines():
    for x in finalRegs.keys():
           ...

We just parse the registers and send the to the server in the same format, and got the key.


The code:

from libcookie import *
from asm import *
import os
import sys

host = 'catwestern_631d7907670909fc4df2defc13f2057c.quals.shallweplayaga.me'
port = 9999

cpuRegs = {'rax':'','rbx':'','rcx':'','rdx':'','rsi':'','rdi':'','r8':'','r9':'','r10':'','r11':'','r12':'','r13':'','r14':'','r15':''}
finalRegs = {'rax':'','rbx':'','rcx':'','rdx':'','rsi':'','rdi':'','r8':'','r9':'','r10':'','r11':'','r12':'','r13':'','r14':'','r15':''}
fregs = 15

s = Sock(TCP)
s.timeout = 999
s.connect(host,port)

data = s.readUntil('bytes:')


#data = s.read(sz)
#data = s.readAll()

sz = 0

for r in data.split('\n'):
    for rk in cpuRegs.keys():
        if r.startswith(rk):
            cpuRegs[rk] = r.split('=')[1]

    if 'bytes' in r:
        sz = int(r.split(' ')[3])


binary = data[-sz:]
code = []

print '[',binary,']'
print 'given size:',sz,'bin size:',len(binary)        
print cpuRegs


for r in cpuRegs.keys():
    code.append('mov %s, %s' % (r, cpuRegs[r]))


#print code

fd = open('code.asm','w')
fd.write('\n'.join(code)+'\n')
fd.close()
Capstone().dump('x86','64',binary,'code.asm')

print 'Compilando ...'
os.popen('nasm -f elf64 code.asm')
os.popen('ld -o code code.o ')

print 'Ejecutando ...'
fd = os.popen("gdb code -ex 'r' -ex 'i r' -ex 'quit'",'r')
for l in fd.readlines():
    for x in finalRegs.keys():
        if x in l:
            l = l.replace('\t',' ')
            try:
                i = 12
                spl = l.split(' ')
                if spl[i] == '':
                    i+=1
                print 'reg: ',x
                finalRegs[x] = l.split(' ')[i].split('\t')[0]
            except:
                print 'err: '+l
            fregs -= 1
            if fregs == 0:
                #print 'sending regs ...'
                #print finalRegs
                
                buff = []
                for k in finalRegs.keys():
                    buff.append('%s=%s' % (k,finalRegs[k]))


                print '\n'.join(buff)+'\n'

                print s.readAll()
                s.write('\n'.join(buff)+'\n\n\n')
                print 'waiting flag ....'
                print s.readAll()

                print '----- yeah? -----'
                s.close()


fd.close()
s.close()


Related links
  1. Programas De Hacker
  2. Hacking Games Online
  3. Hacking Linux

Hacking All The Cars - Part 2


Connecting Hardware to Your Real Car: 

 I realized the other day I posted Part 2 of this series to my youtube awhile ago but not blogger so this one will be quick and mostly via video walkthrough. I often post random followup videos which may never arrive on this blog. So if you're waiting on something specific I mentioned or the next part to a series its always a good idea to subscribe to the YouTube. This is almost always true if there is video associated with the post.  

In the last blog we went over using virtual CAN devices to interact with a virtual car simulators of a CAN network This was awesome because it allowed us to learn how to interact with he underlying CAN network without fear of hacking around on an expensive automobile. But now it's time to put on your big boy pants and create a real CAN interface with hardware and plug your hardware device into your ODB2 port. 

The video I created below will show you where to plug your device in, how to configure it and how to take the information you learned while hacking around on the virtual car from part1 and apply it directly to a real car.   

Video Walk Through Using Hardware on a Real Car


As a reference here are the two device options I used in the video and the needed cable: 

Hardware Used: 

Get OBD2 Cable:
https://amzn.to/2QSmtyL

Get CANtact:
https://amzn.to/2xCqhMt

Get USB2CAN:
https://shop.8devices.com/usb2can


Creating Network Interfaces: 

As a reference here are the commands from the video for creating a CAN network interface: 

USB2Can Setup: 
The following command will bring up your can interface and you should see the device light color change: 
sudo ip link set can0 up type can bitrate 125000

Contact Setup: 
Set your jumpers on 3,5 and 7 as seen in the picture in the video
Sudo slcand -o -s6 /dev/ttyACM can0 <— whatever device you see in your DMESG output
Ifconfig can0 up

Summary: 

That should get you started connecting to physical cars and hacking around. I was also doing a bit of python coding over these interfaces to perform actions and sniff traffic. I might post that if anyone is interested. Mostly I have been hacking around on blockchain stuff and creating full course content recently so keep a look out for that in the future. 

More articles

Printer Security


Printers belong arguably to the most common devices we use. They are available in every household, office, company, governmental, medical, or education institution.

From a security point of view, these machines are quite interesting since they are located in internal networks and have direct access to sensitive information like confidential reports, contracts or patient recipes.


TL;DR: In this blog post we give an overview of attack scenarios based on network printers, and show the possibilities of an attacker who has access to a vulnerable printer. We present our evaluation of 20 different printer models and show that each of these is vulnerable to multiple attacks. We release an open-source tool that supported our analysis: PRinter Exploitation Toolkit (PRET) https://github.com/RUB-NDS/PRET
Full results are available in the master thesis of Jens Müller and our paper.
Furthermore, we have set up a wiki (http://hacking-printers.net/) to share knowledge on printer (in)security.
The highlights of the entire survey will be presented by Jens Müller for the first time at RuhrSec in Bochum.

Background


There are many cool protocols and languages you can use to control your printer or your print jobs. We assume you have never heard of at least half of them. An overview is depicted in the following figure and described below.


Device control

This set of languages is used to control the printer device. With a device control language it is possible to retrieve the printer name or status. One of the most common languages is the Simple Network Management Protocol (SNMP). SNMP is a UDP based protocol designed to manage various network components beyond printers as well, e.g. routers and servers.

Printing channel

The most common network printing protocols supported by printer devices are the Internet Printing Protocol (IPP), Line Printer Daemon (LPD), Server Message Block (SMB), and raw port 9100 printing. Each protocol has specific features like print job queue management or accounting. In our work, we used these protocols to transport malicious documents to the printers.


Job control language

This is where it gets very interesting (for our attacks). A job control language manages printer settings like output trays or paper size. A de-facto standard for print job control is PJL. From a security perspective it is very useful that PJL is not limited to the current print job as some settings can be made permanent. It can further be used to change the printer's display or read/write files on the device.


Page description language

A page description language specifies the appearance of the actual document. One of the most common 'standard' page description languages is PostScript. While PostScript has lost popularity in desktop publishing and as a document exchange format (we use PDF now), it is still the preferred page description language for laser printers. PostScript is a stack-based, Turing-complete programming language consisting of about 400 instructions/operators. As a security aware researcher you probable know that some of them could be useful. Technically spoken, access to a PostScript interpreter can already be classified as code execution.


Attacks


Even though printers are an important attack target, security threats and scenarios for printers are discussed in very few research papers or technical reports. Our first step was therefore to perform a comprehensive analysis of all reported and published attacks in CVEs and security blogs. We then used this summary to systematize the known issues, to develop new attacks and to find a generic approach to apply them to different printers. We estimated that the best targets are the PostScript and PJL interpreters processing the actual print jobs since they can be exploited by a remote attacker with only the ability to 'print' documents, independent of the printing channel supported by the device.
We put the printer attacks into four categories.


Denial-of-service (DoS)

Executing a DoS attack is as simple as sending these two lines of PostScript code to the printer which lead to the execution of an infinite loop:

Denial-of-service%!
{} loop


Other attacks include:
  • Offline mode. The PJL standard defines the OPMSG command which 'prompts the printer to display a specified message and go offline'.
  • Physical damage. By continuously setting the long-term values for PJL variables, it is possible to physically destroy the printer's NVRAM which only survives a limited number of write cycles.
  • Showpage redefinition. The PostScript 'showpage' operator is used in every document to print the page. An attacker can simply redefine this operator to do nothing.

Protection Bypass

Resetting a printer device to factory defaults is the best method to bypass protection mechanisms. This task is trivial for an attacker with local access to the printer, since all tested devices have documented procedures to perform a cold reset by pressing certain key combinations.
However, a factory reset can be performed also by a remote attacker, for example using SNMP if the device complies with RFC1759 (Printer MIB):

Protection Bypass# snmpset -v1 -c public [printer] 1.3.6.1.2.1.43.5.1.1.3.1 i 6
Other languages like HP's PML, Kyocera's PRESCRIBE or even PostScript offer similar functionalities.

Furthermore, our work shows techniques to bypass print job accounting on popular print servers like CUPS or LPRng.

Print Job Manipulation

Some page description languages allow permanent modifications of themselves which leads to interesting attacks, like manipulating other users' print jobs. For example, it is possible to overlay arbitrary graphics on all further documents to be printed or even to replace text in them by redefining the 'showpage' and 'show' PostScript operators.

Information Disclosure

Printing over port 9100 provides a bidirectional channel, which can be used to leak sensitive information. For example, Brother based printers have a documented feature to read from or write to a certain NVRAM address using PJL:

Information Disclosure@PJL RNVRAM ADDRESS = X
Our prototype implementation simply increments this value to dump the whole NVRAM, which contains passwords for the printer itself but also for user-defined POP3/SMTP as well as for FTP and Active Directory profiles. This way an attacker can escalate her way into a network, using the printer device as a starting point.
Other attacks include:
  • File system access. Both, the standards for PostScript and PJL specify functionality to access the printers file system. As it seems, some manufacturers have not limited this feature to a certain directory, which leads to the disclosure of sensitive information like passwords.
  • Print job capture. If PostScript is used as a printer driver, printed documents can be captured. This is made possible by two interesting features of the PostScript language: First, permanently redefining operators allows an attacker to 'hook' into other users' print jobs and secondly, PostScript's capability to read its own code as data allows to easily store documents instead of executing them.

  • Credential disclosure. PJL passwords, if set, can easily retrieved through brute-force attacks due to their limited key space (1..65535). PostScript passwords, on the other hand, can be cracked extremely fast (up to 100,000 password verifications per second) thanks to the performant PostScript interpreters.

PRET

To automate the introduced attacks, we wrote a prototype software entitled PRET. The main idea of PRET is to facilitate the communication between the end-user and the printer. Thus, by entering a UNIX-like command PRET translates it to PostScript or PJL, sends it to the printer, and evaluates the result. For example, PRET converts a UNIX command ls to the following PJL request:


Information Disclosure@PJL FSDIRLIST NAME="0:\" ENTRY=1 COUNT=65535
It then collects the printer output and translates it to a user friendly output.

PRET implements the following list of commands for file system access on a printer device:

Evaluation

As a highly motivated security researcher with a deep understanding of systematic analysis, you would probably obtain a list of about 20 - 30 well-used printers from the most important manufacturers, and perform an extensive security analysis using these printers.
However, this was not our case. To overcome the financial obstacles, we collected printers from various university chairs and facilities. While our actual goal was to assemble a pool of printers containing at least one model for each of the top ten manufacturers, we practically took what we could get. The result is depicted in the following figure:
The assembled devices were not brand-new anymore and some of them were not even completely functional. Three printers had physically broken printing functionality so it was not possible to evaluate all the presented attacks. Nevertheless, these devices represent a good mix of printers used in a typical university or office environment.
Before performing the attacks, we of course installed the newest firmware on each of the devices. The results of our evaluation show that we could find multiple attacks against each printer. For example, simple DoS attacks with malicious PostScript files containing infinite loops are applicable to each printer. Only the HP LaserJet M2727nf had a watchdog mechanism and restarted itself after about ten minutes. Physical damage could be caused to about half of the tested device within 24 hours of NVRAM stressing. For a majority of devices, print jobs could be manipulated or captured.
PostScript, PJL and PML based attacks can even be exploited by a web attacker using advanced cross-site printing techniques. In the scope of our research, we discovered a novel approach – 'CORS spoofing' – to leak information like captured print jobs from a printer device given only a victim's browser as carrier.
A proof-of-concept implementation demonstrating that advanced cross-site printing attacks are practical and a real-world threat to companies and institutions is available at http://hacking-printers.net/xsp/.

Our next post will be on adapting PostScript based attacks to websites.

Authors of this Post

Jens Müller
Juraj Somorovsky
Vladislav Mladenov

Related articles


  1. Hacking Iphone
  2. Hacking Wikipedia
  3. Hacking Definition
  4. Clases De Hacker
  5. Aprender A Ser Hacker
  6. Nivel Basico
  7. Hacking Bluetooth Speaker
  8. Rom Hacking Pokemon
  9. Blog Hacking
  10. Aprender Hacking

How To Start | How To Become An Ethical Hacker

Are you tired of reading endless news stories about ethical hacking and not really knowing what that means? Let's change that!
This Post is for the people that:

  • Have No Experience With Cybersecurity (Ethical Hacking)
  • Have Limited Experience.
  • Those That Just Can't Get A Break


OK, let's dive into the post and suggest some ways that you can get ahead in Cybersecurity.
I receive many messages on how to become a hacker. "I'm a beginner in hacking, how should I start?" or "I want to be able to hack my friend's Facebook account" are some of the more frequent queries. Hacking is a skill. And you must remember that if you want to learn hacking solely for the fun of hacking into your friend's Facebook account or email, things will not work out for you. You should decide to learn hacking because of your fascination for technology and your desire to be an expert in computer systems. Its time to change the color of your hat 😀

 I've had my good share of Hats. Black, white or sometimes a blackish shade of grey. The darker it gets, the more fun you have.

If you have no experience don't worry. We ALL had to start somewhere, and we ALL needed help to get where we are today. No one is an island and no one is born with all the necessary skills. Period.OK, so you have zero experience and limited skills…my advice in this instance is that you teach yourself some absolute fundamentals.
Let's get this party started.
  •  What is hacking?
Hacking is identifying weakness and vulnerabilities of some system and gaining access with it.
Hacker gets unauthorized access by targeting system while ethical hacker have an official permission in a lawful and legitimate manner to assess the security posture of a target system(s)

 There's some types of hackers, a bit of "terminology".
White hat — ethical hacker.
Black hat — classical hacker, get unauthorized access.
Grey hat — person who gets unauthorized access but reveals the weaknesses to the company.
Script kiddie — person with no technical skills just used pre-made tools.
Hacktivist — person who hacks for some idea and leaves some messages. For example strike against copyright.
  •  Skills required to become ethical hacker.
  1. Curosity anf exploration
  2. Operating System
  3. Fundamentals of Networking
*Note this sites


More information


  1. Hacking Pdf
  2. Programas Para Hackear
  3. Curso Seguridad Informatica
  4. Hacking System
  5. Hacking Forums
  6. Hacking Social
  7. Certificacion Ethical Hacking
  8. Viral Hacking

Saturday, April 25, 2020

Web Hacking Video Series #4 MySQL Part 2 (Injection And Coding)

Video Lesson Topics:

  1. Setting up your victim application, databases and lab
  2. Attacking a simple injection with information Schema
  3. Automating your injections with python and beautiful soup
  4. Dealing with various web encoding in Python and PHP
  5. Bypassing LoadFile Size restrictions and automating it
  6. Decrypting sensitive data via PHP and Python interactions
  7. As always me rambling about stupid nonsense :P FTW

Part 2 of Mysql covers the topic of injecting a simple SQL injection example. Starts out slow then combines techniques and moves into more advanced topics. Prior to attempting this lesson make sure you have watched the videos in the previous blog or understand both SQL and basic python coding. I will show how to automate the injection process via python utilizing simple HTML processing abilities of beautiful soup.  I will cover many python libraries for encoding data and calling web based applications. I also talk about how to deal with encrypted data and methods of enumerating files and folders looking for possible implementation issues and attack points to decrypt sensitive data via PHP/Python interaction with whats available on the server. This is the 2nd part of a 3 part series on MySQL for attacking web applications.

Files Needed:
Lab Files
BT5

Video Lesson:

Whats Next:
PHP source code analysis
Recoding PHP applications to fix SQLi

Related news


  1. Que Es El Hacking Etico
  2. Rfid Hacking
  3. Mindset Hacking Español
  4. Hacking Virus
  5. Sean Ellis Hacking Growth

Wednesday, April 22, 2020

Masad Clipper And Stealer - Windows Spyware Exfiltrating Data Via Telegram (Samples)


Reference


"Masad Clipper and Stealer" steals browser information, computer files,  and automatically replaces cryptocurrency wallets from the clipboard with its own.
It is written using Autoit scripts and then compiled into a Windows executable.
It uses Telegram to exfiltrate stolen information.


Download

             Other malware


Hashes

SHA256SHA1MD5
1acf5a461ee16336eb8bbf8d29982c7e26d5e11827c58ca01adac671a28b52ad6001b34c17c122d201613fffd846b056614b66dae03234c2259c474aeb69500423ddeed7
290a1b89517dec10bfd9938a0e86ae8c53b0c78ed7c60dc99e4f8e5837f4f24a32800c10588053813f55bf8c87771311c5f7f38e2df4c1cf093c8373a8f2f194e77b69a2
7937a1068f130a90b44781eea3351ba8a2776d0fede9699ba8b32f3198de045ba2a67b06344e4f1cf85086f6b584316ec53d5e548368f1c4d8f0d908f5f4ff671df5f1da
87e44bca3cc360c64cc7449ec1dc26b7d1708441d471bf3d36cd330db35762942fe5483e6b82220eeeef12e531eb3347fea16ac11082ce517dd23eee335bedfc6bcd8205
cf97d52551a96dacb089ac41463d21cab2b004ba8c38ffc6cb5fb0958ddd34db5b79a15cb61f5260f0b9d807faa160e6d49590e4b5fdf9653eb1ffbdae8cb4f1f2d71747
79aa23c5a25c7cdbaba9c6c655c918dac3d9823ac62ebed9d7d3e94e1eaafc074a279a6b82fe801d3c8be9d16df2ef5623b177040029ab0fd56cd7e493b46a331ef18bd3
03d703f6d341be258ac3d95961ff0a67d4bf792f9e896530e193b091dca29c2ea9740352af2c9cc926deba7dffc452f213f7f05fa462aac76def5b53351b3b1ddb41124c
a368b6755e62e5c0ff79ea1e3bd146ee8a349af309b4acf0558a9c667e78293ae16167ab646381c277c2ca84319ceb57bacb2c92c4cdc7665adb1cda5897d4df4a560f88
ba933cefbe9a8034f0ba34e7d18481a7db7451c8ef4b6172fb0cad6db0513a5100749407e97085af470c75ef004f2235d30af44fc26a3f2317507a09d91014469b045384
3ba3c528d11d1df62a969a282e9e54534fb3845962672ad6d8bbc29cb6d062f5b8100890c0f1894544b3f99168377ec46c38e9114a0607b4488cd539b8b0b443abd121e3
b763054180cd4e24c0a78b49055ad36dbc849f1a096cddf2db8cee0b9338c21d7bec99308ce4bf409417b642cd9432000a5c19d22dfb1d606e5539399aa1a536baafd2f8
d5ce4b04b7eec6530a4a9d40510177468fadc235253e5a74530a8c9d990f3c5027fc204ffa42262b7570b6fccb435d4d38a3610fc5d8b73da810646407c333fe52186281
965a5949d8f94e17ebcd4cb6d0a7c19f49facbfc1b1c74111e5ceb83550d6c8f7698584b2e7c62061447a6a2583ed6957180c205e7ebe4411664672359b393f530fc2fc1
44134b9d4b10d94f6381b446a1728b116d62e65c1a52db45235af12caf7e38c0fd114077927d501606575ba9ab38ecfb3407d432a4388980d7e3539d74a950dab23d00ac
848d76a227f4fe282b7ddfd82a6dfc4c25da2735a684462b42fe4e1c413d8e34135cee7610890497183eb6251efef307ea013fe17bb23077b4f80df48b91b425eda05828
5ca0a957fe6c253827f344da4ba8692d77a4e21a1df4251594be2d27d87dd8aed231874332ca462fb462e4f68450d2c2c22d4bcddda77b3f3f74a2bdffd167917686e139
016fa511f6546ed439d2606c6db8821685a99f5a14ef3f710668b58dc89c69265c83749c62ee0131710bf26931cb1e463a8fbda3b0c34df85677d8f752dc1e1a5eeba0c9
22be594fbfa878f631c0632f6c4d260b00918817ff66a1f9f15efe44c1a58460856d635fca52631305f1fefc58eafa74496524b660ebf41953d5c6e212fc306cdb0c6519
f3571ec66288405dab43332ca03812617f85fb08832fbbe1f1d89901fe034b8a819485e20d841195e2e8a7ae5b41ff709887bb216984d37863c08b9fdd969297d35d3538
04c949eca23103b1de05278b49f42c3ab6b06f4bf20aafa5f2faefaa84c16ecd0487db2df1802dd4ee4ae3b62b5f08937dd5c77c4366ee61cbd7e636aea8540836a60036
d6fc04acda8f33a6d35eb577c27754c2f2b4d6f4869576c7c4e11b2c5e9b017683ae89826114662dad8553d5eeed5217b57047f22bc964e294d7ab314c34e5934d91a5a9
18c0bd4dd98008383fc52045ad896449fa7f0037593bb730ed1ef88aa547006dbcaa05b60a9d625852ac4f2d0d805ab16498815535d9f08c39c4cf396427f3a345e5c09a
4c9d5469e9095813418260045c2b11e499e4eaa0ffb25293f90f580c464157df4c6aacc0b893ed366f9f307326e59efa61e5153450dddaf7e5bb24aabf66eecd0c8b79cf
0b5f1fbc05dc8baca492b748adeb01fb4904e02723b59211ecde222f7b12d91e87f898e0d41c0f2c22d4e9278a942326877fc368da780b72140535d4c2d391e76dc8181d
31ad5c4547ceae4d0550c8460524c16a6105afc056760e872c4966656256c9dc37f485d3fa8f6cf13061cb1ea38ae0d5d2edfd95134aefcf640c24a1ab5344a96150fb05
edb00a0e5ff70e899857549e3263c887a799416c8bbab43ab130ca1be9bbd78c42c30dc551a3cb3bc935c0eae79b79f17942e439c2722241f765d2ad4fb58edd76a4adea
96f852b81760a425befaa11ea37c0cdea2622630bf2a0c94bb95042211ab614d5d9782064bc38d40c88f32c0410479cbd61caa40f332cfcda8c0ef579ede59eff23caa1e
57fd171a5b1a88e9583b42439851a91a940eb31105ab29cb314846da2ed43b820bfec2059823b936d782bea7bc16abd9923dddb56fff82df7a565b4570d299486697310f
277018b2cc6226dca6c7678cac6718c8584f7231340ad8cd7c03477559fdf48b261f916ce97ffc6817a4772705df68e6ccca8181009dc7d8766a85d85bb6a26ee69b66fe
e968affb1fc7756deb0e29807a06681d09a0425990be76b31816795875469e3dcf78484a999183324da9affdf2aaeff508d1dc473e1b8f6313447b8a4b49671ddeb8a4ee
4b1ccf6b823ee82e400ba25b1f532cd369d7e536475a470e2011b77ffeaf7bb3bc988f7cd32d411f2a9888afc72c7a892e2a1def55128a3da6f70129acdbf9dbe955cfe7
fc84d6636a34ad1a11dbaa1daec179e426bdcd9887b3d26dc06b202417c08f951df31bec02e35c9a4656bb3a3bdf631bb37605a855d77ab16377a8a314982f723fcc6fae
9ca15f15fbae58cb97b0d48a0248461e78e34e6d530338e3e5b91f209a1662678505dfaad6d10b84c73544eb748d547cb5bad9bdebc12c530dab0a65c37ffd72612fa705
31f3a402c1662ed6adffbf2b1b65cf902d1df763698eb76d21e4e94b4c62971418c972722d984ff6da2bc26a0aca4c7f209cc39c05bbf6e72b5b24c0c81e0671bf17b1e7
8d9f124ddd69c257189f1e814bb9e3731c00926fc2371e6ebe2654f3950ca02e553cd98c83e945ee3013aa40897baec0305b34a2b4030025e039c54c2d3923057447494c
a0923d7645604faaa864a079adeb741a5d6e65507a2819b2fee4835d396077d9f8e6995e28c789d8b24e982ac53d5d6ba453de73b796f85c8a7de71407d6e3c4206edda3
a19b790ea12f785256510dde367d3313b5267536a58ca0c27dbdac7c693f57e1a92f7393daf7ead9a44b12e35f850705798fc879a6defec886d31f6375712466dd794a96
f030fb4e859ee6a97c50c973a73dced3640befe37f579cfd15367ce6a9bbede2ad3a1e779f02539ccd07bff735e0823add9730b2c259564a8fe72333604a5686e30f6242
f01db6d77ac21211992ceae4e66e1e03c1cb39d61e03645b9369f28252ca769314c6bf63ff4d32d8a0a42e81ea39304fb7ab13c880fe593ef5538fbf66b3b3e1cb7b9b8b
dfe3d0e95feaed685a784aed14d087b019ba2eb0274947a840d2bdbae4ae36742107d057478328df8f538102508de00b0c4b37c7b5a85a0e7a2c4197c3794c8bb2eb5763
bf6083040ca51e83415f27c9412d9e3d700bd0841493b207bc96abf944ab0ca709a695ce6c35c029dd7577e29f403d7144698b417a2edceb31a9c0d05e5f13c6caee0576
b154151dc8ace5c57f109e6bb211a019db20c4f0127c4d13c7703f730bf492768c0cda049c85493df4e97db3db4ddc94075ba62cb6a895ac5ba5b6472680d47410a238a5
6bf6b1bde63cee9b81902efd187fdd56ecee5853754ce0a19d5ab5c3b02429886e2d4f0bcc97ce130ae89647f648d3e96548a391a29f9d176b913e7f693355700aaadbb9
0dcf547bd8f4074af97416d8b84ea64b2f3319064aa4bce64ad0c2e2d3957175a996b925e9391a69140caf6e4adba928694ffe66dd575413a40839f2807593aa21c71152
6cff1249cc45b61ce8d28d87f8edc6616447e38168e610bed142f0b9c46ea6849baa823deb9075e8df77b891115c019244de09de488bb5c0739485721182c01a82b01d14
5b5ebe019806885bbaafe37bc10ca09549e41c240b793fd29a70690a5d80b4963d46711f9064b96ff2d0affdef1ecd82d120659db95e2d8a8509ac05f5445d18d32cc7cb
103d87098c9702cab7454b52869aeeb6a22919f29a7f19be7509255ce2d8c83ee29a163488438c9ea9014ddf1a9b2d382cc5d7e6baf2587fafaedbab4a78b9b7fd8b55f8
c73675005a09008bc91d6bc3b5ad59a630ab4670dca6ac0d926165a3ecfd8d92d8ea2280cd06a5cc32b7d668e2b4b2e68f3a7e2a98ecc6fbb2cb5649daf751fcbfb81bcb
ef623aadd50330342dc464a31b843b3d8b5767d62a62f5e515ac2b380b208fbe620ff5a7aaf7f3fcf4abc9365e0e77b3ec4b434db14535c5835c9dfb3cbbc7f6fef6034c

Continue reading


Web Hacking Video Series #4 MySQL Part 2 (Injection And Coding)

Video Lesson Topics:

  1. Setting up your victim application, databases and lab
  2. Attacking a simple injection with information Schema
  3. Automating your injections with python and beautiful soup
  4. Dealing with various web encoding in Python and PHP
  5. Bypassing LoadFile Size restrictions and automating it
  6. Decrypting sensitive data via PHP and Python interactions
  7. As always me rambling about stupid nonsense :P FTW

Part 2 of Mysql covers the topic of injecting a simple SQL injection example. Starts out slow then combines techniques and moves into more advanced topics. Prior to attempting this lesson make sure you have watched the videos in the previous blog or understand both SQL and basic python coding. I will show how to automate the injection process via python utilizing simple HTML processing abilities of beautiful soup.  I will cover many python libraries for encoding data and calling web based applications. I also talk about how to deal with encrypted data and methods of enumerating files and folders looking for possible implementation issues and attack points to decrypt sensitive data via PHP/Python interaction with whats available on the server. This is the 2nd part of a 3 part series on MySQL for attacking web applications.

Files Needed:
Lab Files
BT5

Video Lesson:

Whats Next:
PHP source code analysis
Recoding PHP applications to fix SQLi

Related links


How To Install Windscribe - The Best Free VPN On GNU/Linux Distros?


Why should you use Windscrive?
   Windscribe is well-known for their free VPN service but they also have a paid version. Only with a free account, you will get 10 countries to connect through and change your real IP address and 10GB of free traffic (if you use an email to sign up Windscribe), and unlimited devices.

   The Free version is awesome, but the Pro one is even better! With Pro version you will get Unlimited DataUnblock over 60 Countries and 110 CitiesConfig Generator (OpenVPN, IKEv2, SOCKS5), and full protection from R.O.B.E.R.T.

   For your information, Windscribe is one of the best VPN services in the category Free AuditValue Audit and Overall Audit in BestVPN.com Awards 2019 (Read the White Paper here). You totally can believe in Windscribe (100% no logs).

   And about R.O.B.E.R.T, it's an advanced DNS level blocker that protects you from MalwareAds and TrackersSocial trackingPornGamblingFake NewsClickbait and Cryptominers. Read more about R.O.B.E.R.T.


Anyway, Windscribe helps you:
  • Stop tracking and browse privately: Governments block content based on your location. Corporations track and sell your personal data. Get Windscribe and take back control of your privacy.
  • Unblock geo-restricted content: Windscribe masks your IP address. This gives you unrestricted and private access to entertainment, news sites, and blocked content in over 45 different countries.
  • Take your browsing history to your grave: Protect your browsing history from your network administrator, ISP, or your mom. Windscribe doesn't keep any logs, so your private data stays with you.
  • Stop leaking personal information: Prevent hackers from stealing your data while you use public WIFI and block annoying advertisers from stalking you online.
  • Go beyond basic VPN protection: For comprehensive privacy protection, use our desktop and browser combo (they're both free).

   Windscribe also supports Chrome browser, Firefox browser, Opera browser, Smart TV, Routers, Android, iOS, BlackBerry, Windows OS, Mac OS X and GNU/Linux OS, you name it.

   You can install Windscribe on Ubuntu, Debian, Fedora, CentOS, Arch Linux and their based distros too.

   But to install and safely use Internet through Windscribe, you must sign up an account first. If you already have an account then let's get started.

How to install Windscribe on Arch and Arch-based distros?
   First, open your Terminal.

   For Arch Linux and Arch-based distro users, you can install Windscribe from AUR. Run these commands without root to download and install Windscribe on your Arch:


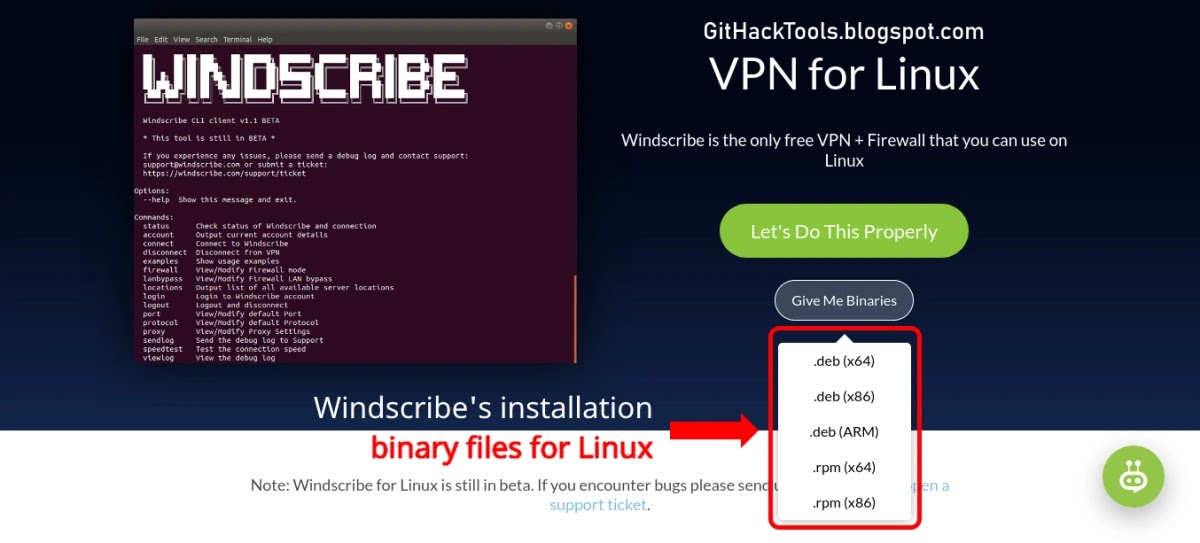
   For other distro users, go to VPN for Linux - Windscribe choose the binary file that compatible with your distro (.DEB for Debian and Ubuntu based, .RPM for Fedora and CentOS based) and then install it.
dpkg -i [Windscribe .DEB package]
rpm -ivh [Windscribe .RPM package]


   Or you can scroll down to Pick Your Distro, click to the distro version you use, or click to the distro version that your distro is based on and follow the instructions.

   Now enter these commands to auto-start a and log in to Windscribe.

   Enter your username and password and then you can enjoy Windscribe's free VPN service.

How to use Windscribe on Linux?
   This is Windscribe list of commands (windscribe --help):
   If you want Windscribe to chooses the best location for you, use windscribe connect best.

   But if you want to choose location yourself, here is the list of Windscribe's locations:
   *Pro only
   Example, i want to connect to "Los Angeles - Dogg", i use windscribe connect Dogg.

   If you want to stop connecting through Windscribe use windscribe disconnect.

   For some reasons, you want to log out Windscribe from your device, use windscribe logout.

I hope this article is helpful for you 😃


Related news